Futures traders often face inefficiencies when juggling charting platforms, broker interfaces, and prop firm dashboards. By directly connecting charting tools like TradingView or NinjaTrader to funded accounts with firms such as Apex Trader Funding or Take Profit Trader, you can analyze, manage, and execute trades from a single interface. This setup reduces errors, enforces trading rules, and improves workflow.
Here’s what you need to know:
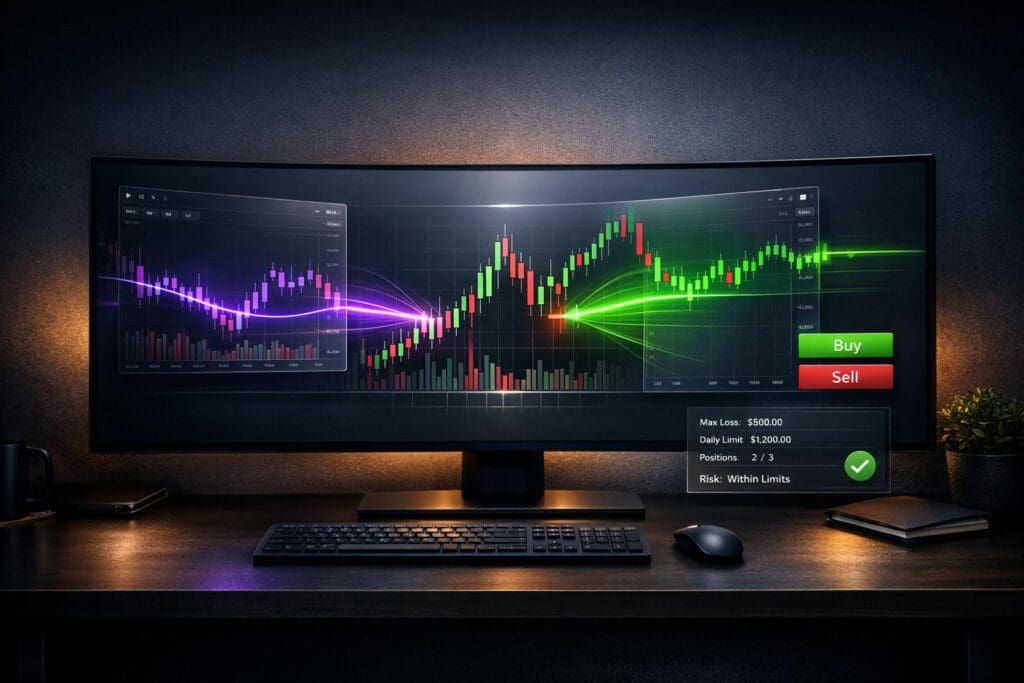
- Integration Benefits: Manage trades visually, monitor account balances, and stay compliant with futures prop firm rules.
- Platforms Supported: TradingView and NinjaTrader are popular options, offering features like real-time data, custom indicators, and advanced analytics.
- Setup Steps: Choose the right broker (e.g., Tradovate or Rithmic), activate platform add-ons, and ensure proper account configurations.
- Common Issues: Fix delayed data by signing exchange agreements, resolve login errors by syncing your system clock, and avoid redundant data feeds.
Properly connecting your tools ensures smoother trading and adherence to firm guidelines, giving you an edge in the competitive world of funded futures trading.
Charting Tools and Futures Prop Firms Explained
What Charting Tools Do
Charting platforms serve as your all-in-one hub for analyzing price movements and executing trades seamlessly. They display essential data like candlestick patterns, volume profiles, and custom indicators, helping traders pinpoint entry and exit opportunities on futures contracts such as the E-mini S&P 500 or crude oil. Platforms like TradingView and NinjaTrader go a step further by offering Direct Market Access (DMA), which sends your orders straight to the exchange. This feature is especially handy during volatile markets, where speed can make all the difference.
One standout feature of advanced platforms is visual order management. Instead of manually entering numbers, you can adjust stop-losses and take-profits directly on the chart as the price fluctuates. Additionally, tools like Depth of Market (DOM) provide real-time views of bid and ask liquidity, helping scalpers identify large orders and adjust strategies accordingly. As OnlyPropFirms aptly puts it:
The right charting tool is more than a screen full of candles. It’s your edge.
Mastering these tools is critical, especially when working within the strict guidelines of futures prop firms.
How Futures Prop Firms Work
Futures prop firms offer traders access to evaluation capital – usually between $25,000 and $250,000 – allowing them to prove their trading skills while adhering to stringent risk management rules. To participate, traders pay an upfront fee, often discounted by as much as 70% to 90%, to enter the evaluation phase. During this phase, traders must meet profit targets without exceeding daily loss limits or maximum drawdown thresholds. Successful participants are granted access to funded accounts, either simulated or live, and share profits with the firm. Some firms even offer 100% of the first $25,000 in profits, followed by a 90% split on additional earnings.
Consistency is the real hurdle. Many firms implement a 30% consistency rule, ensuring no single trading day accounts for more than 30% of a trader’s total profits. This discourages risky, high-stakes trades aimed at quickly reaching targets. The challenge is evident in the numbers: only 1.01% of participants at MyFundedFutures advanced to live-capital accounts between January 2024 and July 2025.
Charting tools play a crucial role in meeting these expectations. They sync real-time account balances and open positions, allowing traders to monitor drawdowns and adjust position sizes before breaching firm rules. This integration can be the difference between success and failure in the tightly controlled world of prop trading.
| Platform Role | Function in Prop Trading |
|---|---|
| Prop Firm | Provides capital and enforces account rules |
| Broker (e.g., Tradovate) | Executes trades and manages live data feeds |
| Charting Tool | Supplies analysis, indicators, and visual interface |
How to Connect Futures Prop Firms To TradingView (Step by Step)

How to Connect Charting Tools to Futures Prop Firms
How to Connect TradingView to Futures Prop Firms Step-by-Step Guide
Connecting TradingView to Apex Trader Funding
To connect TradingView with Apex Trader Funding, you’ll need to use Tradovate. When setting up your Apex account, make sure to choose Tradovate as your platform to enable this integration.
Here’s how to get started:
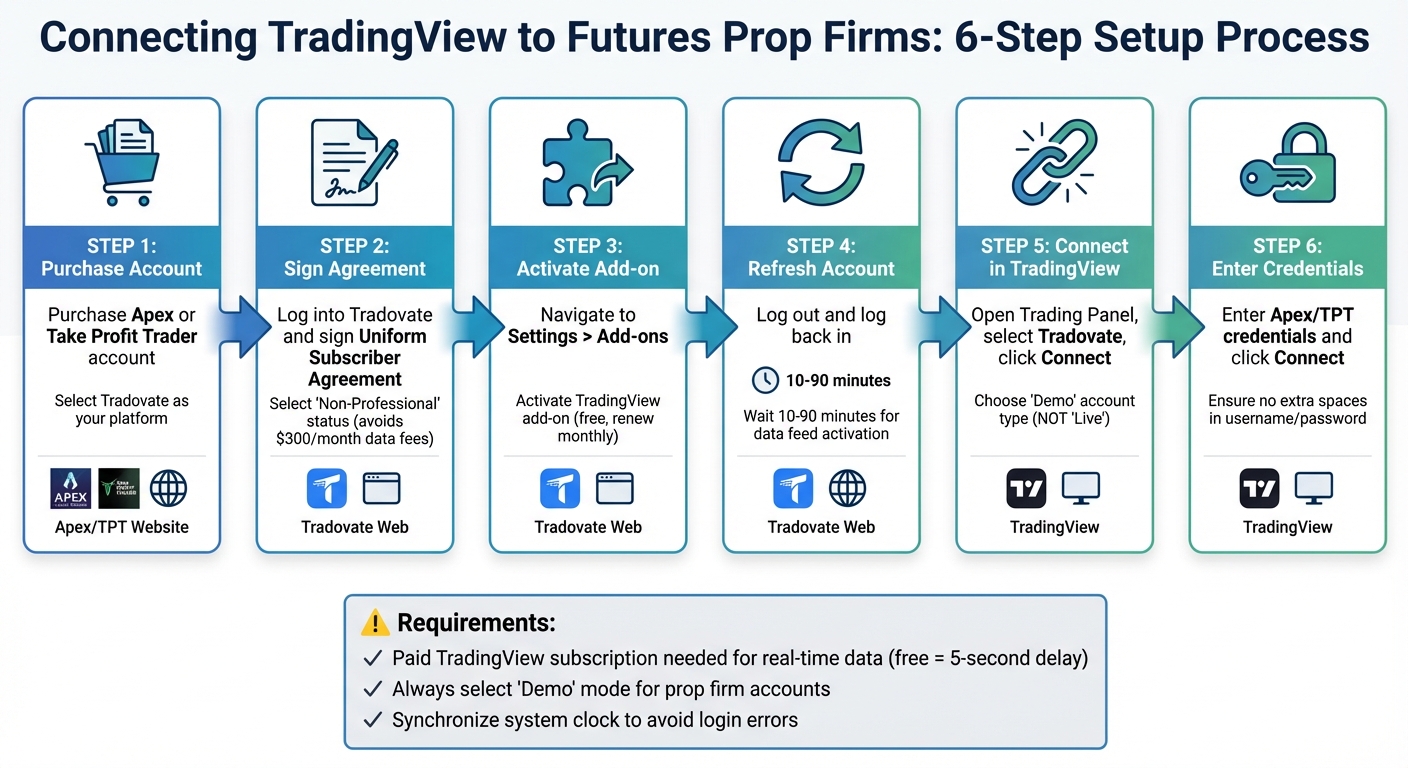
- Log into Tradovate using your Apex credentials. Once inside, sign the Uniform Subscriber Agreement and select "Non-Professional" status to avoid hefty data fees (up to $300/month).
- Go to Settings > Add-ons in Tradovate and activate the TradingView add-on. After that, log out and back in to refresh your account. It may take 10 to 90 minutes for the data feed to fully activate.
- Open TradingView, navigate to the Trading Panel, and select Tradovate. Click "Connect" and choose "Demo" as your account type – prop firm accounts routed through Tradovate’s simulation environment will not work if set to "Live".
- Enter your Apex credentials carefully, ensuring no extra spaces, and click "Connect." As PickMyTrade advises:
"Choose ‘Demo’, then enter your Tradovate username and password (found on your Apex Trader Funding Dashboard) and click Connect."
Keep in mind that while the TradingView add-on is free through Tradovate, you’ll need to renew it monthly. Plus, if you want real-time data, you’ll need a paid TradingView subscription – free accounts only update every 5 seconds.
| Step | Action | Platform |
|---|---|---|
| 1 | Purchase an Apex account and select Tradovate as your platform | Apex Website |
| 2 | Log in and sign the agreement as Non-Professional | Tradovate Web |
| 3 | Navigate to Settings > Add-ons and activate TradingView | Tradovate Web |
| 4 | Log out and log back in to refresh your status | Tradovate Web |
| 5 | Open the Trading Panel, select Tradovate, and click Connect | TradingView |
| 6 | Enter your Apex credentials and select Demo mode | TradingView |
Connecting TradingView to Take Profit Trader

The process for connecting TradingView to Take Profit Trader is almost identical to the Apex setup. Here’s what you need to know:
Direct Trading: Follow the same steps as for Apex – sign the agreement as "Non-Professional", activate the TradingView add-on, and connect through the Trading Panel in Demo mode. To avoid "Logon failed" errors, synchronize your system clock.
Automated Execution: If you’re looking to automate trading based on TradingView alerts, you can use TradersPost. This tool sends alerts to your Tradovate account via webhooks. To use TradersPost, you’ll need a ProjectX-enabled account and a $29/month subscription [16,17]. Note that ProjectX accounts don’t support bracket orders through TradersPost, so you’ll need to manually configure take-profit and stop-loss levels in your risk settings.
As with Apex, data activation for Take Profit Trader can take 10 to 90 minutes. It’s a good idea to keep the Tradovate web platform open in a separate browser tab while using TradingView, so you can manage your orders directly.
Connecting NinjaTrader to Futures Prop Firms
If you prefer NinjaTrader, it offers excellent integration options with prop firms like Apex Trader Funding and Take Profit Trader. The connection type depends on the credentials provided by your prop firm.
- Apex usernames with a hyphen (e.g., Apex-XXXX) use Rithmic feeds.
- Apex usernames with an underscore (e.g., Apex_XXXX) use Tradovate feeds.
To set up NinjaTrader:
- Enable Multi-Provider Mode by going to Tools > Options > General and checking the box. Restart NinjaTrader to apply the changes. This feature allows you to connect to multiple data feeds simultaneously, which is helpful for managing multiple accounts.
- For Rithmic connections, open NinjaTrader’s Control Center, select Connections, and choose "Rithmic for NinjaTrader Brokerage." Enter your credentials and set the system to "Apex" or "Rithmic Paper Trading." If your firm uses Plug-in Mode, log into RTrader Pro to complete any required data agreements.
- For Tradovate connections, select "NinjaTrader" as the connection type, enter your credentials, and set the account type to Simulation – even for funded accounts.
| Prop Firm | Connection Type in NinjaTrader | Specific Requirements |
|---|---|---|
| Apex Trader Funding | Rithmic OR NinjaTrader (Tradovate) | Set system to "Apex" or "Rithmic Paper Trading" |
| Take Profit Trader | NinjaTrader (CQG) OR Rithmic | Choice depends on the account type purchased |
To confirm the connection, check the status indicators in NinjaTrader’s Control Center. If you experience issues, ensure your Windows clock is synchronized and double-check your credentials for any extra spaces.
sbb-itb-46ae61d
Fixing Common Integration Problems
Getting integration right is essential for reliable data flow and smooth, real-time order execution – both of which are key for success in prop trading. Addressing these frequent issues builds on earlier connection steps, ensuring your charting and trading tools work seamlessly together.
Data Feed and Symbol Problems
One of the most annoying issues traders face comes from conflicting subscriptions or unsigned exchange agreements. If your charts are showing delayed or missing data, check for overlapping CME subscriptions. For instance, having a CME subscription on TradingView while connecting through Tradovate creates redundant feeds that can cause errors. To fix this, cancel any extra CME subscription and rely solely on your broker’s data feed.
Unsigned data agreements are another common snag. Log into your broker’s web platform (like trader.tradovate.com or RTrader Pro) and complete the required exchange agreements. Most traders select "Non-Professional" status to avoid higher data fees. Once signed, data feed activation can take anywhere from 10 minutes to 4 hours.
If you’re seeing a “Logon Failed” error, your Windows system clock might be out of sync. Tradovate requires precise time synchronization, so go to Settings > Time & Language > Date & Time and click Sync now to resolve this. Also, when entering your credentials, double-check for any accidental spaces – just one extra space can block authentication.
| Issue | Primary Cause | Recommended Solution |
|---|---|---|
| Logon Failed | Incorrect Account Type | Change Account Type to "Simulation" |
| Missing/Delayed Data | Redundant Subscriptions | Cancel TradingView CME sub; use broker feed |
| Connection Dropped | Expired Add-on Permission | Re-authorize TradingView in Tradovate settings |
| No Data on Chart | Unsigned Agreements | Sign CME terms via broker web portal |
Once these issues are resolved, it’s time to dive into platform-specific settings.
Platform Restrictions and Compatibility
Prop firms often enforce specific platform configurations, and ignoring these can lead to problems. For NinjaTrader users, enabling Multi-provider mode is a must. Go to Tools > Options > General, check the box, and restart the platform. This allows you to connect to multiple prop firm feeds simultaneously. Without this setting, your accounts won’t show up or connect.
For Tradovate-based accounts, such as those from Apex Trader Funding or Take Profit Trader, always set the Account Type to "Simulation", even for funded accounts. This isn’t a mistake – it’s just how the platform is designed. TradingView users, on the other hand, need at least a paid Pro plan to access the trading panel and execute orders directly from charts.
If you’re using Rithmic connections (like Apex usernames with a hyphen, e.g., Apex-XXXX), remember that only one active session is allowed at a time. Tradovate, however, supports multiple simultaneous connections. For Rithmic setups, always log into RTrader Pro first, then launch NinjaTrader to establish the data bridge properly.
With these settings squared away, the next step is to address order execution and synchronization.
Order Execution and Sync Problems
When orders fail to appear or are rejected, the issue often boils down to risk rules or expired permissions. Prop firms enforce daily loss limits, drawdown and loss rules, and position caps directly at the broker level. These settings override any orders placed through platforms like TradingView or NinjaTrader.
If your TradingView trading panel disappears or stops connecting, log into the Tradovate web platform. Go to Add-ons, toggle the TradingView integration off and back on, and this will regenerate your credentials. For slow execution or lag, try clearing your browser cache or using an incognito window to avoid script conflicts.
To confirm everything is synced, place a test micro-contract order. Use specific contract months (like ESZ5) instead of continuous symbols (like ES1!) for more accurate fills and tracking. In NinjaTrader, check the connection status in the Control Center: a green circle means everything is synced, yellow indicates a temporary issue, and red signals a failed connection.
Conclusion
Integrated charting tools bring a new level of efficiency to futures prop trading by combining real-time price analysis with instant order execution. Orders sync across platforms effortlessly, creating a smooth and streamlined workflow.
Beyond making operations smoother, integration can lead to substantial cost savings and better risk management. For instance, many proprietary trading firms cover platform access fees and CME data feeds, which can save traders hundreds of dollars every month. If you’re managing multiple accounts, trade copiers can mirror setups across as many as 20 accounts within milliseconds. This not only boosts efficiency but also minimizes slippage. Features like visual order management – such as dragging stop-loss levels directly on a chart – offer precise risk control in sync with live price movements.
Whether you’re linking TradingView to Apex Trader Funding or configuring NinjaTrader with Take Profit Trader, or exploring Topstep offers, following the correct setup steps and addressing potential issues ensures your tools work together seamlessly. Proper integration allows your trading tools to function as a cohesive system, enhancing both efficiency and compliance.
Before diving into live trading, test your connection in simulation mode, ensure all necessary exchange agreements are signed, and activate Multi-Provider Mode in NinjaTrader if you’re handling multiple accounts. By thoroughly reviewing and testing your setup in a simulated environment, you can unlock the full potential of your trading tools and optimize your performance with funded capital.
FAQs
Do I need a live or simulation connection for my prop firm account?
To get started, you’ll need the right type of connection. If you’re testing or practicing, go with a simulation connection. However, if you’re trading with real money, you’ll need a live connection. Be sure to choose the setup that aligns with your current trading goals and status.
What’s the cheapest way to get real-time CME data without double-paying?
For the most cost-effective access to real-time CME data without paying extra, Databento is a solid choice. Their service offers live CME full order book data starting at just $32.65 per month, with license fees passed directly to you – no hidden markups. This means you get reliable, real-time data at a price that’s hard to beat.
How can I confirm my orders are syncing correctly before trading live?
To make sure your orders are syncing properly, run a synchronization check using trade automation tools such as trade copiers. Use simulated orders to confirm that details like order size, price, and execution are consistent across all linked accounts. Keep an eye out for any syncing issues, enable disconnection alerts, and check for real-time updates on platforms like Tradovate or Tradeify. Regular testing helps catch potential problems early and ensures seamless performance during live trading.