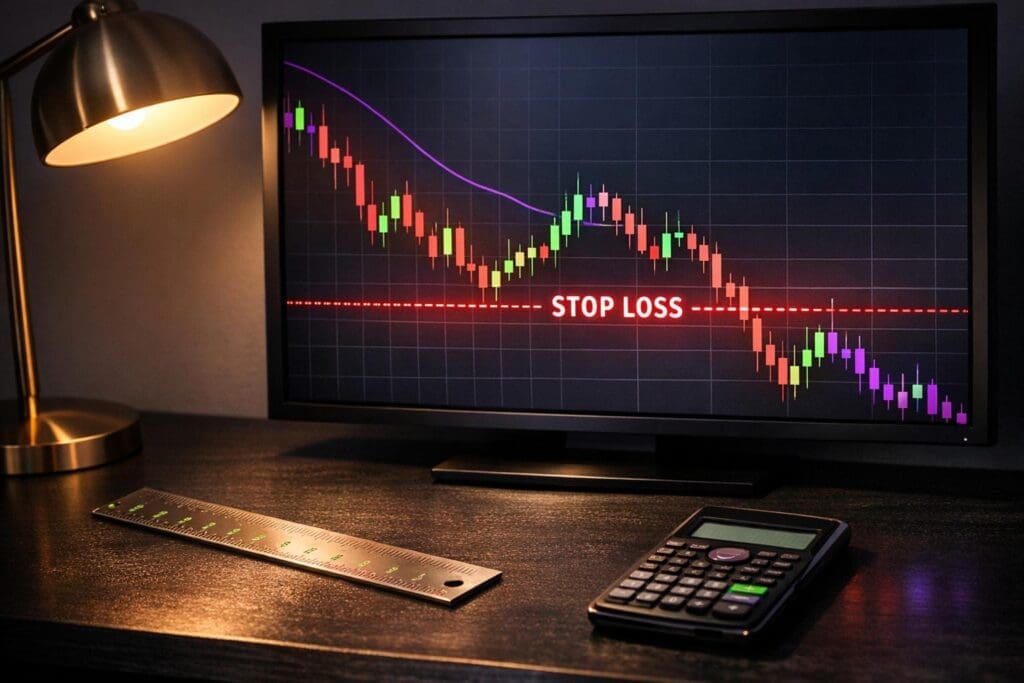
Stop loss distance is more important than finding the perfect entry point. Why? Because it directly impacts your position size and risk management. Here’s the main takeaway:
- Stop loss placement defines your risk per trade. Without it, you can’t calculate how many contracts to trade while staying within your risk limits.
- A tight stop isn’t always better. It may increase position size but risks being hit by normal market fluctuations.
- Risk management starts with stop loss distance. It determines when your trade idea is invalid and protects your account from large losses.
For example, if you risk 1% of a $50,000 account ($500), a 50-point stop on the E-mini Nasdaq (MNQ) allows one contract. But a 100-point stop reduces your position to 0.5 contracts. This ensures consistent risk, regardless of stop distance.
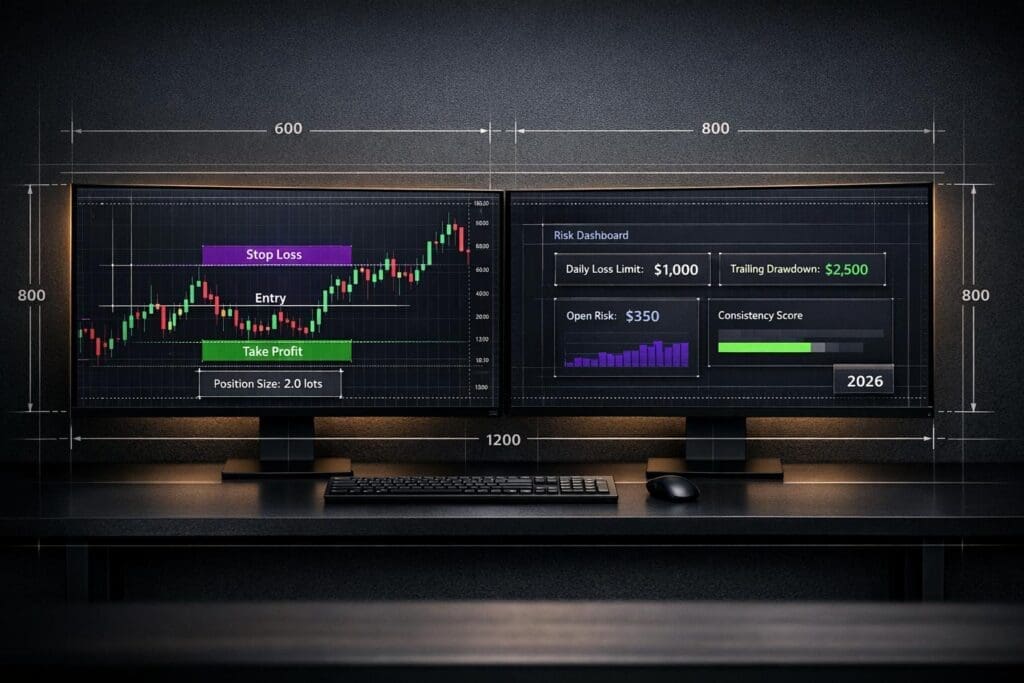
Prop firms like Apex Trader Funding and Topstep enforce strict rules on drawdowns and daily loss limits. Misplacing your stop can lead to account breaches, even if your trade idea is solid. To avoid this, calculate your position size based on stop loss distance before entering any trade.
Key Formula:
Position Size = Dollar Risk ÷ (Stop Distance × Dollar Value per Tick)
Stop loss placement should align with market structure, such as support/resistance levels, swing highs/lows, or volatility indicators like ATR. Tools like stop loss calculators simplify this process, helping you stay disciplined and compliant with firm rules.
Bottom line: Protecting your capital through proper stop loss placement is the foundation of long-term trading success.
Where To Put Your Stop Loss (For The BEST Results)
Risk Management and Position Sizing Basics

Stop Loss Distance Impact on Position Sizing and Risk Management
Risk management is all about keeping losses in check. The key to this lies in understanding how the distance of your stop loss directly impacts your position size. Here’s the relationship: a wider stop means you’ll trade fewer contracts, while a tighter stop allows for more contracts, all while keeping your dollar risk the same.
This approach – keeping risk consistent – separates disciplined traders from gamblers. By risking the same dollar amount on every trade, you make risk a constant rather than a fluctuating variable. In this formula, your stop loss distance becomes the critical factor in determining position size. Mastering this concept is what keeps traders in the game and prevents account blowouts. It ties back to the earlier discussion on the importance of stop loss placement, emphasizing how proper stops protect your trading capital.
Now, let’s explore how this principle connects to setting risk limits using the 1% rule.
The 1% Risk Rule
The 1% rule is straightforward: never risk more than 1% of your account balance on a single trade. For a $10,000 account, that’s $100. On a $50,000 account, it’s $500. This isn’t just about playing it safe – it’s about staying in the game.
"The number one goal of trading isn’t to make money fast; it’s to stay in the game." – Kathy Lien, Market Analyst
The math speaks for itself. By risking only 1% per trade, you can withstand over 50 consecutive losses. On the other hand, risking 10% per trade means just 5–6 losses could wipe you out. Recovering from large losses is even tougher. A 1% loss requires only a 1.01% gain to recover, but a 50% loss demands a 100% gain just to break even.
To ensure you’re sticking to the 1% rule, you first need to identify the distance between your entry point and stop loss. This is why professional traders determine their stop level first – based on technical factors like support or resistance – and then calculate how many contracts they can trade based on that distance.
With your risk limits in place, the next step is to calculate position size using your stop loss distance.
How to Calculate Position Size Using Stop Loss Distance
Experienced traders calculate position size before entering a trade. The formula is simple:
Position Size = Dollar Risk ÷ (Stop Distance × Dollar Value per Tick).
This formula puts the theory of risk control into action. Let’s break it down with an example:
Imagine you have a $10,000 account and are risking 1%, which equals $100. You’re trading the E-mini Nasdaq (MNQ), where each point is worth $2. Let’s say your technical analysis places your stop loss 50 points away from your entry.
Here’s the math:
$100 ÷ (50 points × $2) = 1 contract.
If the market requires a 100-point stop, the calculation changes:
$100 ÷ (100 points × $2) = 0.5 contracts.
Since you can’t trade half a contract on MNQ, you’d either skip the trade or switch to a smaller instrument.
| Instrument | Contract Value/Tick | Stop Distance | Position Size ($10,000 Account, $100 Risk) |
|---|---|---|---|
| Gold E-mini (MGC) | $10 per point | 10 points | 1 Contract |
| Gold E-mini (MGC) | $10 per point | 20 points | 0.5 Contracts (Skip or use Micro) |
| Nasdaq E-mini (MNQ) | $2 per point | 50 points | 1 Contract |
| Nasdaq E-mini (MNQ) | $2 per point | 100 points | 0.5 Contracts (Skip or use Micro) |
This demonstrates why stop loss distance is more important than entry precision. Even a perfectly timed entry can lead to disaster if your stop is poorly calculated and you’re trading too many contracts. Always round down when your position size calculation results in a fraction – never round up.
How to Determine the Right Stop Loss Distance
Your stop loss should be set at the price level where your trade idea no longer holds true.
One of the most common mistakes traders make is placing their stops too close to the entry point, which often leads to getting stopped out prematurely. The key is to let the market guide you in determining the right stop level. Three effective methods for this are using support and resistance levels, volatility indicators, and swing highs and lows. Some traders even look for overlapping signals, or “confluence,” where multiple methods point to the same stop level. Let’s break down these methods to help you find the best stop-loss placement for your trades.
Placing Stop Losses at Support and Resistance Levels
Support and resistance zones are areas where buying or selling pressure has historically been concentrated. For a long position, you’d place your stop slightly below a support level; for a short position, slightly above a resistance level. However, it’s important to leave some room for market noise by placing your stop just beyond these levels.
If you put your stop exactly at the support or resistance level, you risk falling victim to "stop hunting." This happens when large market players briefly push the price beyond these levels to trigger clustered stops. To avoid this, add a buffer of 1.5 to 3 times the Average True Range (ATR) beyond the technical level.
To identify support and resistance, look for multi-touch lows or highs, volume clusters, or price shelves on 5- to 15-minute charts. Once you’ve pinpointed the level, calculate the buffer (1.5x–3x ATR), and use that distance to adjust your position size. As Galen Woods puts it:
"A logical stop-loss point is not implied by our risk appetite. It is highlighted by market price action".
Using Volatility Indicators for Stop Loss Placement
Volatility-based stops rely on tools like the Average True Range (ATR), which measures how much an asset typically moves over a given period – usually 14 periods. This makes it a reliable way to account for current market conditions. A common rule of thumb is to place your stop 2 to 3 times the ATR value away from your entry point. For example, if you’re trading the E-mini S&P 500 and the ATR is 20 points, your stop would be 40 to 60 points from your entry.
Interestingly, nearly half of all investors fail to adjust their stops based on volatility. Using ATR helps solve this problem. Markets.com describes ATR as:
"an objective and standardized volatility measurement by smoothing out volatility and filtering out market noise".
If you’re swing trading, you might want to increase the ATR lookback period to 20 or even 30 periods. This adjustment helps filter out short-term noise and provides a more stable basis for your stop placement.
While volatility is critical, combining it with market structure can make your stop-loss strategy even more effective.
Using Swing Highs and Lows for Stop Loss Placement
Swing highs and lows are natural pivot points where the price has previously reversed, making them useful for stop placement in trending markets. For long positions in an uptrend, place your stop below the most recent swing low. For short positions in a downtrend, place it above the most recent swing high. These points act as markers for trend continuation or reversal. If the price breaks through a swing point, it often signals a shift in the trend’s structure.
This method allows your stops to adapt to the market’s current behavior instead of relying on fixed distances. To refine this approach, combine swing point analysis with an ATR-based buffer. First, identify the swing high or low, then add a buffer based on the ATR. This creates a stop that is both aligned with market structure and adjusted for volatility. It’s a practical way to handle shifting market conditions, which static stop distances often fail to accommodate. By using this approach, you’re aligning your risk management with the market’s natural movements, promoting a disciplined and flexible trading strategy.
sbb-itb-46ae61d
Tools and Calculators for Stop Loss Placement
When it comes to determining position size with precise stop loss distances, specialized tools can make life a lot easier. Calculating stop losses manually, especially in fast-moving markets, can lead to costly errors. Factors like tick values, contract sizes, and proprietary firm risk limits add complexity. Using dedicated calculators simplifies these tasks, so you can focus on analyzing the market instead of crunching numbers.
Stop Loss Distance Calculators
Once you’ve set your stop loss level, stop loss calculators become indispensable. These tools calculate the distance between your entry and stop loss, then determine how many contracts you can trade while keeping your risk within a set percentage of your account – usually 0.5% to 1%. For example, if you’re trading with a $50,000 funded account and place a 10-point stop on the E-mini S&P 500 (ES), where each point is worth $50, the calculator will suggest trading one contract to stay within your risk limits.
Some calculators also incorporate the Average True Range (ATR) indicator. These tools use the formula:
Entry Price ± (ATR × Multiplier)
A 2× ATR multiplier is often seen as a balanced choice for funded accounts. For instance, if the ATR on ES is 20 points, the calculator would recommend a 40-point stop and adjust your position size accordingly. This approach ensures your stop loss aligns with market volatility while managing risk effectively.
Beyond stop loss calculators, there are tools to help you stay compliant with proprietary firm rules.
Consistency Rule Calculator by DamnPropFirms

In addition to stop loss tools, calculators like the Consistency Rule Calculator from DamnPropFirms help traders adhere to profit consistency guidelines set by prop firms. Firms like Topstep and Apex Trader Funding enforce rules to prevent traders from depending on a single big win or taking excessive risks. Typically, these rules limit any single trading day to contribute no more than 30% to 50% of your total profits. Violating this could mean missing out on payouts even if you meet your profit targets.
The Consistency Rule Calculator simplifies this process. By entering details like your account size, current profit, and the firm’s consistency percentage, the tool calculates the maximum dollar amount you should aim for on your next trade. For example, if you’ve earned $3,000 on a $50,000 Topstep account and the firm caps daily profits at 40%, the calculator will flag that your next winning day shouldn’t exceed $1,200. This helps you adjust your stop loss and position size to maintain a stable profit pattern. It’s a practical way to ensure long-term success while staying within firm guidelines.
Stop Loss Rules at Top Futures Prop Firms
Futures prop firms each have their own set of risk rules, which influence how traders manage stop losses and position sizes. These rules – covering everything from drawdowns to daily limits – play a crucial role in determining where and how you place your stops. Understanding these firm-specific policies is essential for safeguarding your trading capital.
Apex Trader Funding Stop Loss Rules

Apex Trader Funding operates with an unrealized trailing drawdown. This mechanism tracks your intraday equity peaks in real time, including open trades. If your account equity hits the trailing threshold, your account is liquidated immediately. The drawdown level moves upward as your account reaches new highs but never adjusts downward, even if subsequent trades result in losses or smaller profits. This can make managing risk particularly tricky.
"The unrealized trailing drawdown at Apex Trader Funding is the single biggest rule that trips up traders. Unlike a static drawdown, it moves up with your account’s highest unrealized gains and never moves back down." – DamnPropFirms
For Paid Performance (PA) accounts, the drawdown threshold stops moving once it reaches your starting balance plus $100. However, because the drawdown trails unrealized gains, letting trades run without locking in profits can push the threshold dangerously high. Even a small pullback could trigger liquidation. To avoid this, traders are advised to maintain a buffer of $100–$300 above the threshold and use bracket orders to secure profits before the drawdown climbs too far.
Apex does not impose a daily loss limit, offering more flexibility in intraday risk management. However, the 30% Profit Rule for PA accounts limits any single day’s profit to 30% of your total gains. This consistency requirement discourages taking oversized risks on individual trades. Apex has paid out over $400 million to traders since 2022, but the trailing drawdown remains the most common reason for account failures.
| Account Size | Trailing Threshold (Drawdown) | Profit Goal |
|---|---|---|
| $25,000 | $1,500 | $1,500 |
| $50,000 | $2,500 | $3,000 |
| $100,000 | $3,000 | $6,000 |
| $150,000 | $5,000 | $9,000 |
| $250,000 | $6,500 | $15,000 |
Next, let’s look at how Topstep’s risk rules differ from Apex’s approach.
Topstep Risk and Stop Loss Requirements

Topstep takes a different approach to risk management. In Live Funded Accounts, traders are required to place a protective stop-loss order on every open position. This ensures that no trade is left unprotected, reinforcing disciplined trading habits.
Unlike Apex, Topstep calculates its Maximum Loss Limit (MLL) based on your end-of-day balance, not intraday equity peaks. This gives traders more leeway compared to firms that use high-water mark calculations. While Topstep also enforces a Daily Loss Limit (DLL), this operates as a "soft breach." If you hit the limit, your positions are closed, and the account is locked until the next session, but the account isn’t permanently failed unless the MLL is breached.
"Topstep’s MLL is based on your end of day balance, unlike other prop firms, who calculate it on unrealized profits intraday (high water mark). We have the best drawdown in the business and give you more room to trade." – Topstep
The platform includes built-in Bracket Orders, allowing traders to set profit targets and stop losses automatically at entry. This feature removes the stress of manual adjustments during volatile markets. Similar to Apex, Topstep enforces a Consistency Target, which prevents traders from relying on one oversized win to inflate their profits. This means stop loss placement must align with steady, consistent trading rather than high-risk, high-reward strategies. With a 4.5 out of 5 rating on Trustpilot from over 7,900 reviews, Topstep is recognized for its transparency and educational tools, though some traders find its rules more restrictive compared to competitors.
Finally, let’s explore Take Profit Trader’s approach, which offers a simpler risk structure through its fixed drawdown method.
Take Profit Trader Stop Loss and Risk Rules

Take Profit Trader uses a static drawdown, which stays fixed at a specific dollar amount and doesn’t trail your account balance. This makes it easier to predict your risk levels and plan stop loss distances.
The firm allows flexibility in how traders manage stop losses, but it still enforces a daily loss limit and a maximum drawdown limit, both calculated on an end-of-day basis. This setup provides more breathing room during the trading day compared to firms that monitor intraday equity changes.
Take Profit Trader’s consistency rules are less stringent than Topstep’s, but traders are still expected to show steady gains rather than relying on a single large win. This means your stop loss strategy needs to distribute risk across multiple trades rather than focusing on one high-stakes setup. These rules encourage a balanced approach to trading that aligns with Take Profit Trader’s parameters.
Conclusion
Here’s the bottom line: you can’t control the market, but you can control your risk. While nailing the perfect entry might feel satisfying, it won’t save your account when the market moves against you. What truly matters is your stop loss placement – it defines the point where your trade idea no longer holds and ensures that losses stay manageable, not devastating.
"The market defines your risk/reward, not the other way around." – Optimus Futures
Stop placement should always come first. Many traders make the mistake of focusing on tight entries while ignoring logical stop distances. This often leads to being stopped out by normal market fluctuations. When emotions take over stop placement decisions, it’s your trading edge that pays the price.
Disciplined stop loss strategies are the backbone of long-term success. With a reward-to-risk ratio of 2:1, you can stay profitable even if you win just 40% of your trades. But this only works if your stops are thoughtfully placed – aligned with market structure, such as key support and resistance levels, swing highs and lows, or adjusted for volatility using tools like ATR.
For futures traders, especially those working under prop firm guidelines, stop loss discipline is non-negotiable. Firms like Apex Trader Funding, Topstep, and Take Profit Trader enforce strict risk limits, including drawdown and consistency rules. Ignoring proper stop placement can mean breaching your account on a single bad trade. Preserving capital always outweighs precision, because staying in the game long enough to let your strategy work is the real key to consistent profitability.
FAQs
Why is stop loss distance more important than getting the perfect entry in trading?
The placement of your stop loss plays a key role in trading because it directly impacts your risk per trade, helps you determine the right position size, and ensures your trades follow solid risk management practices. While nailing a precise entry point might feel satisfying, it’s the stop loss that acts as a safeguard, shielding your account from heavy losses during unexpected market swings.
Strategically setting your stop loss also supports maintaining a balanced reward-to-risk ratio – an essential factor for staying profitable in the long run. By prioritizing risk management through well-thought-out stop loss strategies, you can create a more reliable and consistent trading approach, particularly when trading with futures prop firms like DamnPropFirms.
Why does stop loss distance matter for position size and risk management?
The distance you set for your stop loss plays a key role in determining both your position size and the level of risk you take on each trade. A wider stop loss means a higher potential loss per contract, so you’ll need to decrease your position size to stay within your risk limits. On the flip side, a tighter stop loss reduces the potential loss per contract, allowing you to take on a larger position size while still following your risk management rules.
Adjusting your stop loss distance with care helps ensure your trades align with your risk tolerance and account management strategy. This is especially critical for futures traders working with prop firms, where strict risk guidelines are non-negotiable.
How can I determine the right distance for my stop loss?
To set a stop loss that works for you, start by determining how much you’re comfortable risking on a trade – this is often around 1-2% of your account balance. Once you’ve chosen that dollar amount, divide it by the tick or point value of the contract. This will help you calculate how far your stop loss should be from your entry price, ensuring it aligns with your risk tolerance.
Another approach is to use chart-based strategies. For instance, you could place your stop just beyond recent support or resistance levels, near swing highs or lows, or around key moving averages. If you want something more flexible, consider tools like the Average True Range (ATR). ATR helps you adjust your stop loss based on market volatility, so it can expand during volatile periods or tighten when the market is calmer. Trailing stops are also a smart choice, as they let you secure profits if the trade moves in your favor.
By combining a clear risk management plan with techniques like support/resistance levels or volatility-based adjustments, you can set a stop loss that protects your funds while allowing the trade enough space to play out. Striking this balance is essential for long-term success, especially when trading futures with prop firms.