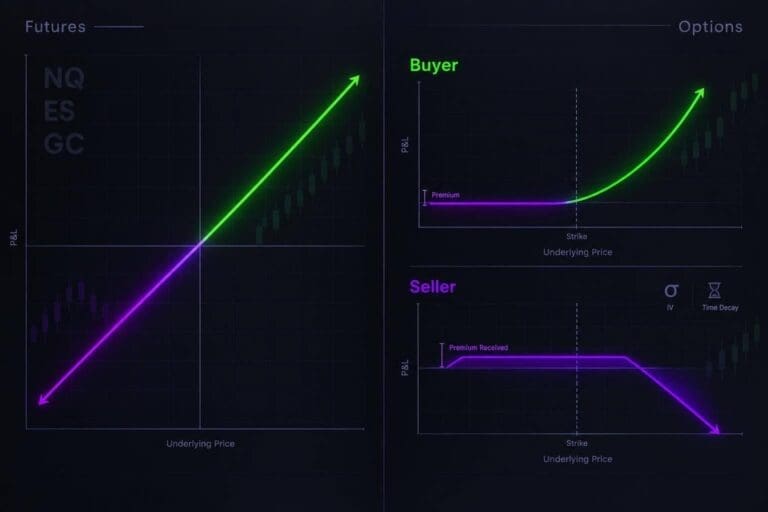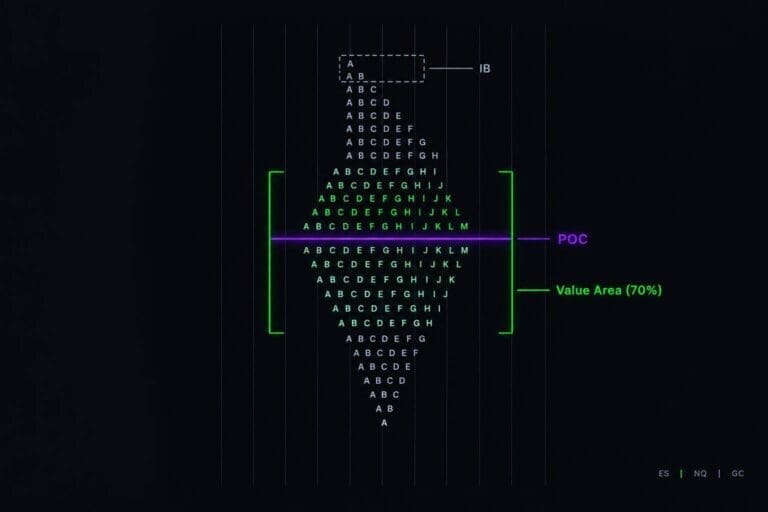
ProjectX is usable for futures prop trading, but the main point is simpler: you’re not picking a platform in a vacuum. In 2026, you’re using it through TopstepX, so the fit comes down to order handling, risk management lockouts, and whether the browser setup matches how you trade when the market gets wild. I’d treat it like a tool with hard guardrails, not like some magic edge. Below, I’m cutting through the fluff: where ProjectX is solid, where it’s tight, what can trip you up, and what I’d test in sim before putting any eval or funded account at risk.
What Is ProjectX and Why Does It Matter for Prop Trading?
ProjectX is a web-based futures front end now branded as TopstepX. The big deal is simple: risk limits sit in the same order-routing layer, so if you break a rule, the platform deals with it right then, not after the fact. That matters most if you trade fast and want hard guardrails built into execution. [1][3]
Who ProjectX Is Built For
This setup makes the most sense for active CME futures traders, especially intraday traders and scalpers. You get TradingView-native charting, a fast DOM, and an on-screen risk dashboard that shows how much drawdown room you’ve got left. That’s the kind of info you want in front of your face, not buried in a menu. [1][4]
A couple of built-in controls stand out:
- Manual Lockout lets you flatten and block new orders.
- Personal Daily Profit Target stops trading once you hit your number.
That said, it’s not built for everything. If you need advanced automation, custom indicators, or multi-account management, ProjectX will feel tight pretty fast. [1][5]
How ProjectX Fits Into a Prop Firm Workflow
The day-to-day workflow is pretty straightforward. You log in, pick your evaluation or funded account, then check the on-screen numbers before you do anything else: profit target, unrealized trailing drawdown, and daily loss limit. That’s the basic pre-trade routine inside the platform. [1][4]
What Traders Usually Want to Know First
Before they care about charting or DOM features, most traders want the same answer first: does it stay responsive during the open? [6][7]
sbb-itb-46ae61d
How to Set Up ProjectX for Daily Futures Trading
Set up ProjectX before the open. That’s how you avoid dumb mistakes with the wrong account, bad sizing, or a hotkey that doesn’t fire when you need it.
Workspace and Layout Basics
Once your account is active, build a layout you can trust when the market gets fast. ProjectX uses a modular drag-and-drop workspace, so keep the panels you actually need on screen: the TradingView chart, DOM ladder, positions, fills, and accounts. Leave the Rule-Guard Bar pinned at the top. It shows, in real time, how much room you have left before the daily loss limit and trailing maximum drawdown get hit. Save the workspace when you’re done so your indicators load the same way at the next session.[4][6][9]
After the layout is in place, lock down the account and order settings before you touch the market.
Settings to Configure Before Your First Trade
Check these before the open:
- Active account – Make sure you’re on the right Trading Combine or Funded account.[4]
- Default quantity – Set this on the DOM entry bar. For micros like MES or MNQ, 1 contract is a safe starting point.[4]
- Order confirmations – Set them to fit how you place orders.[6][9]
- Hotkeys – Map Flatten, Reverse, and Cancel All under Settings → Hotkeys. Then click the DOM panel once before the session starts. Hotkeys only work when the DOM has focus.[4]
You can also set a Personal Daily Profit Target inside the risk controls. If you hit that number, ProjectX can lock trading for the rest of the session.[5]
Once that’s done, check the data feed before you send anything live.
Data Feed and Connection Checks
ProjectX streams CME Group market data in near real time. Before trading, confirm the feed is moving. The easiest check is the Rule-Guard Bar. If the drawdown numbers are updating, you’re connected. If they look frozen, stop there and fix the setup before placing an order.
For continuous charts, use ES1! or NQ1!. That keeps you from staring at an expired contract by accident.[4][6][7]
With the workspace saved, the feed moving, and the hotkeys checked, ProjectX is set for order entry.
ProjectX Charts and DOM: What They Look Like in Real Trading
With the workspace set, the next thing that matters is simple: does the chart help, or does it get in your way when you’re managing orders live?
Charting Features That Matter for Intraday Trading
ProjectX runs on browser-based TradingView charts, so you don’t need separate software just to load indicators or mark up levels.[1][4] That’s a big deal if you want to keep your setup clean. For intraday trading, VWAP should be your main reference.[4]
Chart trading is built in too. You can place brackets on the chart and drag your stop-loss or take-profit to a new level without messing around in a separate order window.[4] That’s the kind of thing that sounds small until the market starts moving fast.
Using the DOM for Faster Order Entry
The DOM ladder is made for fast, visual order entry. ProjectX shows the bid and ask stacks, volume at each price, and your working orders all in one ladder. You also get one-click buy and sell from the DOM itself.[4] If you’re trading speed, that’s where you want to work.
You can also turn on order confirmations for buy, sell, reverse, and cancel actions.[6] That’s worth doing if you want a bit of protection against fat-finger mistakes.
The DOM also lets you drag stops and targets right on the ladder.[4] No extra steps. Just move the order where it needs to go.
How Tick Size and USD P&L Display on Screen
ProjectX shows your real-time P&L, your remaining daily loss limit, and your trailing drawdown buffer on the rule-guard bar.[4] That’s useful because you can see your risk numbers without hunting through menus.
The platform shows contract values in USD. On ES, one tick is $12.50. On NQ, one tick is $5.00.[4] That part matters more than some traders admit. If you trade the same size on both without thinking, your risk changes fast.
Before you place orders, match your size to the instrument you’re trading.[1][4]
Once the chart and DOM feel dialed in, the next piece is how order entry and order changes hold up in actual use.
How Order Entry Works on ProjectX
Once your chart and DOM are set up, the next thing that matters is simple: can ProjectX handle entries, exits, and order edits without getting in your way?
Order Types ProjectX Supports
ProjectX supports the core futures order types: Market, Limit, Stop, Stop-Limit, and OCO brackets.[2][4][8] That’s the standard stuff you need to get orders in, get out, and manage risk without doing dumb extra clicks.
Market orders route right away when one-click mode is on.[4] Limit orders sit at a set price. Stop and Stop-Limit orders handle entry or exit triggers. OCO brackets tie your profit target and stop-loss together, so when one fills, the other gets canceled.[4]
That all sounds normal on paper. What matters more is how those orders act when the market starts moving fast.
Chart Trading vs DOM Trading: Which to Use When
Use the chart for planned entries. Use the DOM when speed matters.
Chart trading fits best when your trade is built around a level you’re already watching. You can place the order right on the chart, then drag your stop and target lines as the trade moves.[4][6] That keeps everything tied to the setup in front of you, which is cleaner than bouncing between windows.
DOM trading is more about fast hands and fast reactions. If you scalp or trade order flow, that speed matters.[4] When the market is moving, the DOM is usually the better tool. No fluff. It’s just faster.
Modifying Orders Without Losing Control of Your Position
After you’re in the trade, this is the part that counts: can you adjust exits without turning the whole thing into a mess?
ProjectX doesn’t make you do the old cancel-and-replace routine when moving a stop or target. You just drag the order line to the new price, and the platform updates it in place.[4] That’s how it should work.
Bracket exits stay linked, so be careful when you adjust them. One small move in the wrong spot can change more than you meant to. In a fast market, that kind of mistake gets expensive fast.
Bracket Orders on ProjectX: Which Style Fits Prop Traders?
Bracket mode controls how ProjectX handles your exits after you get filled. The main choice is simple: should exits track your net position, or should they track each fill on its own?
For prop traders, that choice matters more than it sounds. Get it wrong, and your risk can look one way while your P&L behaves another. It also changes how ProjectX deals with scaling, exits, and risk once the trade is live.
Position Brackets vs Auto OCO Brackets: The Real Difference
ProjectX gives you two bracket modes, and they do not act the same once you’re in a live trade.
Position brackets treat your whole net position as one piece. If you start with 1 ES contract and then add 1 more, the bracket updates to cover 2 contracts total. That’s the cleaner setup for trend trades and straightforward scaling.
Auto OCO (one-cancels-the-other) brackets connect exit orders to each entry fill. So if you add a second contract at a different price, that second fill gets its own stop and target.
| Bracket Feature | Position Bracket | Auto OCO Bracket |
|---|---|---|
| Manages | Net position (total contracts) | Individual entry fills |
| Scaling In | Adjusts total exit size automatically | Creates new exit pairs per fill |
| Best For | Trend trades, simple scaling | Multi-target strategies, scalping, complex scale-ins |
When to Use Each Bracket Type
Use position brackets for single-entry trend trades. Clean and easy.
Use Auto OCO when you’re scaling in, peeling out partials, or running multi-target setups. The downside is obvious: more exit lines on the screen, more to track, and more room for mistakes when the market starts moving hard.
Bracket Mistakes That Cause Execution Problems
This is where traders get jammed up. Not in calm conditions. In fast tape, when the platform needs to do EXACTLY what you expected.
Don’t switch bracket modes while a position is open. Also, don’t flatten manually before canceling active bracket orders. That can create duplicate exits or leave orders out of sync, with working orders still sitting there after you think you’re flat.
Stops and targets only go live after the entry fills. If you assume those orders are already working before the fill is confirmed, you can sit exposed longer than you planned.
The DOM size field also carries over between sessions. Check it before entry. A stale size can throw the whole bracket off and put on the wrong order size.
Bracket behavior is only one piece of live risk control. The next part is how ProjectX handles firm limits in real time.
Risk Controls and Limits to Watch on ProjectX
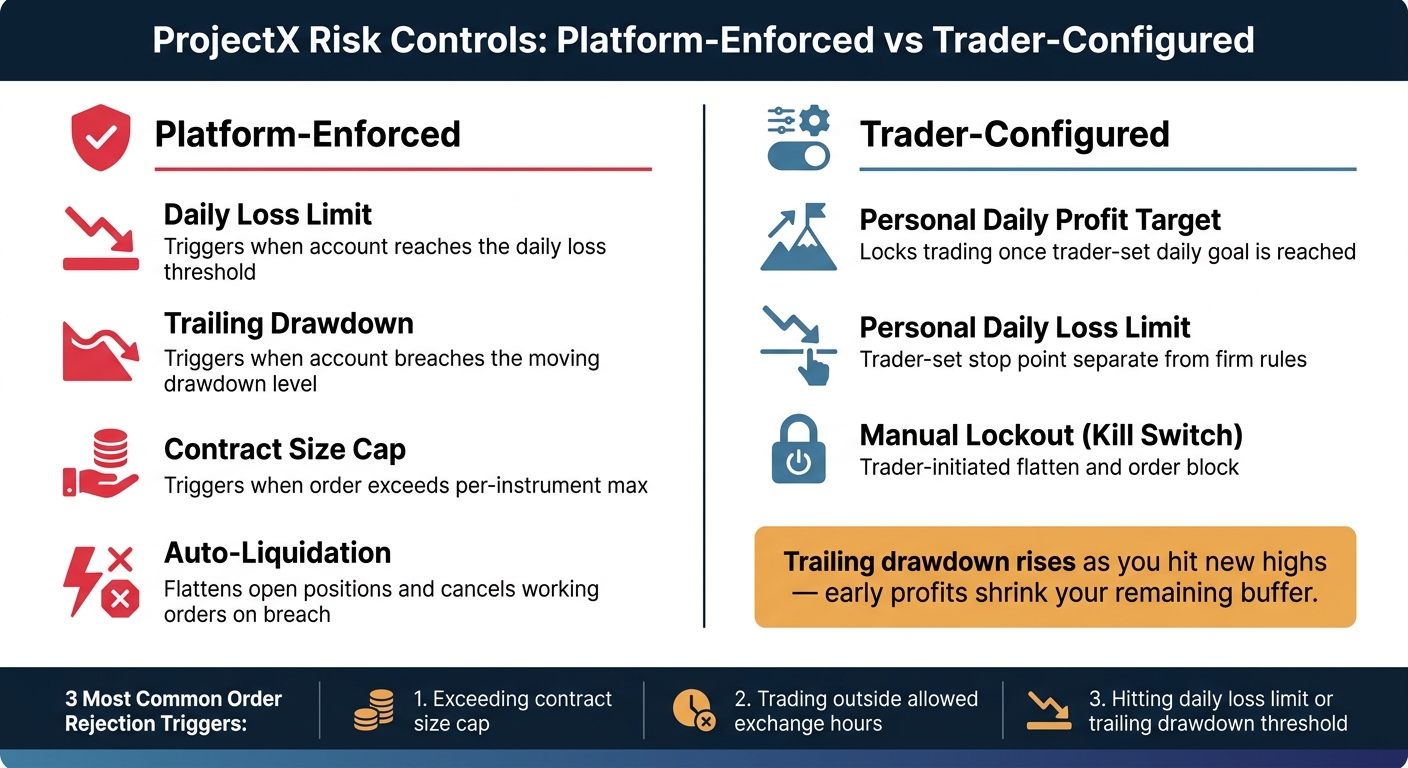
ProjectX Risk Controls: Platform-Enforced vs Trader-Configured Limits
Bracket behavior and platform limits can screw up a trade for the same reason: both can kick you out when you weren’t expecting it. On ProjectX, that can end a trade or kill an evaluation fast. The whole game is knowing which limits the platform enforces for you and which ones you set yourself.
Platform Limits vs Trader Controls
ProjectX runs hard limits in real time. If you break one, it can block the order or flatten the position on the spot. The dashboard shows your account balance, P&L, trailing drawdown status, and daily loss threshold live. That trailing drawdown climbs as you make new highs, so early profits can actually shrink your room later.
On top of the firm-side limits, ProjectX also gives you Personal Daily Profit Targets and Personal Daily Loss Limits. Those are your lockouts, not firm rules. If your personal profit target gets hit, the account can lock and stop you from turning a solid day into a dumb giveback. So before you enter any trade, you need both numbers in your head: the firm’s hard limit and your own stop points.
| Risk Control | What Triggers It | Who Enforces It |
|---|---|---|
| Daily Loss Limit | Account reaches the daily loss threshold | Platform-enforced |
| Trailing Drawdown | Account breaches the moving drawdown level | Platform-enforced |
| Contract Size Cap | Order exceeds the per-instrument max | Platform-enforced |
| Personal Profit Target | Trader-set daily goal is reached | Trader-configured |
| Manual Lockout | Trader clicks the kill switch | Trader-initiated |
Common Order Rejections and What Causes Them
Most rejections come from three things:
- Going over the contract size cap
- Trading outside allowed exchange hours
- Hitting the daily loss limit or trailing drawdown threshold
Once a limit gets breached, the platform can auto-liquidate open positions, cancel working orders, and block new entries for the rest of the session [1].
Manual Lockout flattens positions and stops trading. Know where it is before the open. Not after.
These checks matter most right before live trading starts, because one rejection can wreck an active trade plan in seconds.
Why Getting These Details Right Protects Your Progress
The stakes here are simple. One session with the wrong size, failing to follow prop firm consistency rules, one missed trading window, or one loss that tags the limit can end an evaluation early.
Set your contract caps. Confirm the allowed hours. Keep the risk dashboard on screen during the session. Then you can focus on the next issue: whether ProjectX stays responsive when the market starts moving fast.
How Reliable Is ProjectX During Live Futures Sessions?
After your risk settings are dialed in, this is the part that matters: does ProjectX keep up when the tape gets wild? You don’t need marketing fluff here. You need order routing that doesn’t choke, hotkeys that fire when you hit them, and bracket orders that stay attached when volatility picks up.
Speed, Routing, and Stability in Fast Markets
ProjectX runs on browser-based cloud routing, so your orders route in the cloud, not directly from your PC [4][6]. It also streams CME market data with refresh rates as fast as 50 milliseconds [6][7].
That setup is fine on paper. The problem is reliability hasn’t been spotless. From October through December 2025, ProjectX logged 11 confirmed outages where stop-loss and take-profit orders failed to execute during live CME hours [3]. Since the start of 2026, the platform has reported a 99.99% monthly average uptime [5].
That’s a lot better, but the 2025 outage stretch is still worth remembering if you trade fast markets.
Hotkeys have one annoying catch: they only work when the DOM has focus. If you’re trading the open, click back into the DOM and make sure it has focus before things start moving.
Supported Products and Exchange Coverage
ProjectX supports futures on CME, CBOT, NYMEX, and COMEX [5][4]. So you’re covered on the main stuff:
- Equity index contracts and micros
- Metals
- Energy
- Treasuries
- Grains
What to Test Before You Trade It Live
The big one is account sync. Check the balance and trailing drawdown on the rule-guard bar against the numbers on your member dashboard [4]. If they don’t match, stop right there and figure out why. That kind of mismatch can point to dashboard desync, and that issue has been linked to past outage periods [3][4].
Before any high-volatility session, run a short preflight:
- Click the DOM panel once so keyboard focus is active, then test one hotkey before the open [4].
- Send a test bracket on a micro contract like MES or MNQ and make sure the stop and target show up the way they should and still respond to drag-and-drop [4].
- Check the default order size on the DOM bar. It sticks between sessions, so verify it every day to avoid a fat-finger order [4].
- Make sure your chart is set to the current continuous contract so the data stays live [4].
Common ProjectX Problems and How to Fix Them
After setup and preflight, the usual pain points are pretty predictable: account lockouts, DOM focus, wrong symbol, and stale size settings. When a live session goes sideways, check those four in that order. It saves time and is part of scaling funded accounts with discipline.
Why Orders Will Not Send
The most common reason is a locked account. If orders stop going out, check that first. Look at the rule-guard bar. If that looks clear, check DOM focus next. A dead hotkey setup is often just the DOM panel not being active.
The other two usual blockers are contract cap and contract month. Make sure you’re on the active contract, not some expired month sitting on an old chart. Also check your max-contract setting. If the platform is capped at a certain size, anything above that gets rejected on the spot.
Use this table to narrow it down fast.
| Issue | Most Likely Cause | First Check |
|---|---|---|
| Order won’t send | Account locked by risk limit | Rule-guard bar |
| Hotkeys dead | DOM panel not in focus | Click inside the DOM ladder |
| Order went to wrong account | Account switcher mismatch | Top-left account switcher |
| Order rejected immediately | Contract size cap exceeded | Settings → max contracts |
| DOM shows no data | Data stream still initializing | Wait 20–30 seconds after login [4] |
Why Brackets or P&L Look Wrong
If brackets or P&L look off, start with two things: the contract symbol and the DOM quantity field. Make sure the chart is on the active contract. Then check size. The DOM quantity field sticks between sessions, so don’t assume it’s still set the way you left it.
For brackets, verify the template on the DOM order entry bar before you place the trade. Once you’re in a position, use the DOM drag-and-drop controls to check and adjust stop and target levels. If the bracket still looks off after a partial fill or scale-in, go straight to the order blotter below the chart. That’s the cleanest place to confirm the actual fill sequence.
Also compare your account balance to the trailing drawdown buffer shown in the rule-guard bar. That’s your real headroom. Not the number in your head. If the dashboard looks stale or out of sync, refresh the browser.
How to Review Your Trades After the Session
When the session is over, use the same three spots to verify what actually happened. The chart gives you the visual view. ProjectX’s TradingView integration puts trade markers right on the chart, so you can line up entries and exits with price action.
Then check the order blotter below the chart. That’s the one that matters most for post-session review. It logs fills, cancellations, and rejections, which makes it the best place to confirm what happened with an order [4].
Use the chart, the blotter, and the dashboard together to verify entries, exits, and session results.
Bottom Line: Should You Use ProjectX for Futures Prop Trading?
After the setup, chart, DOM, bracket, and reliability checks above, this comes down to one thing: does ProjectX fit the way you trade? ProjectX now runs as TopstepX inside Topstep, so that’s the call you need to make.
Traders Who Will Get the Most Out of ProjectX
If your execution flow and risk controls line up with how you trade, ProjectX makes a lot of sense. It fits intraday futures traders who want hard risk limits built straight into execution.
The draw is pretty simple: browser access, synced workspaces, TradingView charts, and a clean DOM that feels built for fast order entry.
Traders Who May Want a Different Platform
If your style leans on heavy customization, the trade-offs hit fast. This isn’t the platform for traders who need custom scripting, deep automation, multi-firm workflows, or a heavily customized low-latency setup. The lock-in matters too. ProjectX tech only exists inside Topstep’s ecosystem [1][3], so your whole workflow ends up tied to one firm’s platform stack.
Where to Go Next on Damn Prop Firms
Use these next:
- The Topstep review on Damn Prop Firms
- The Prop Firm Comparison Tool
- The Position Size Calculator
FAQs
Is ProjectX good for beginners?
Yes. ProjectX, now available only as TopstepX, is a good pick for newer traders. It runs in your browser, takes almost no setup, and doesn’t bury you in menus. That matters when you’re still trying to get clean with entries and exits instead of fighting the platform.
The TradingView charting helps, too. So does the simple DOM. Order entry feels more approachable than it does on clunkier setups, which is a big deal if you’re not ready to deal with a bunch of extra platform noise.
Another plus: it builds prop-firm guardrails right into the platform. Stuff like daily loss limits and trailing drawdown rules is enforced on-platform, which can save you from dumb mistakes when you’re still getting your process under control.
The trade-off is simple. TopstepX is locked to Topstep. You can’t use it with other prop firms, and you can’t just run it as a standalone platform.
What should I test in sim first?
Before you use ProjectX for funded evaluations, run your full process in sim first. Not part of it. The whole thing.
- Check execution speed and latency with DOM trading during volatile periods.
- Make sure bracket orders trigger take-profit and stop-loss levels correctly.
- Confirm your workspace, TradingView indicators, lockout buttons, risk settings, and order confirmations are set up and working as intended.
This is basic, but it matters. You don’t want to find out during a live eval that your stop didn’t fire, your bracket setup is off, or your lockout button isn’t where you thought it was. Sim is where you catch the dumb stuff before it costs you.
Can ProjectX lock you out mid-session?
Yes. ProjectX can lock you out mid-session if you hit your daily loss limit. If that happens, it will close your open positions and block new orders for the rest of that session.
You can also use the same feature in your favor. Set a lockout after you hit a daily profit target, or use the manual lockout button as a personal kill switch when you need to stop trading.